Subscribe
TO OUR NEWSLETTER
Subsribe to our email newsletter today to receive update on the latest news, tutorials and special offers!
How to Install a Water Softener? A General Guide to a typical Water Softener Installation
As one of the largest online stockist of Water Treatment solutions and in particular Water Softeners from the brand leaders including Monarch Water, Tapworks and BWT softeners we felt it our duty to give you some guidance of the typical installations of water softener.
The installation of a water softener is relatively easy, but it is recommended that this work is undertaken by a plumber or an experienced DIY handyman. Where possible the water softener should be sited close to the rising main, allowing for any required hard water draw off points, i.e. drinking tap and outside tap.
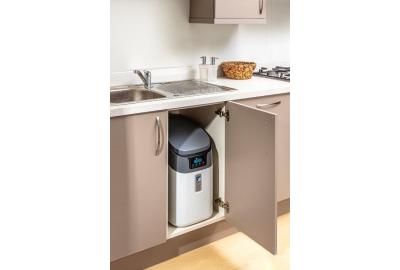
Keep the drain run as short as possible and allow for ease of service and salt access. If installed next to a boiler or hot water cylinder you may have to protect against condensation. When siting the softener please place on a sound base and consider space for accessing the unit for servicing etc.
Sufficient space should be left behind the unit to allow easy access for repairs and cleaning. Depending on which softener you decide to gor for you may need a clearance above the lid of the water softener to allow for the Water Softener Salt to be topped up.
The installation of all water fittings should be in accordance with local water bylaws and the water softener, and all associated pipework, must be protected against freezing. Take special care where the drain runs outside. Freezing will prevent recharge and cause overflowing.
Remember that if you are buying an electric water softener it will require a 3 pin 240 volt electrical supply. If you dont have a power point near where you want to position the unit then you will require a Non Electric Water Softener.
Important: Water Authority bylaws require that one tap in the house remains unsoftened. It is also recommended that the garden tap is left with a hard water supply. In line filter taps are available from as little as £40 and should be installed at the same time as the water softener.
Low or high pressure could lead to damage or non-operation of the water softener. If the daytime pressure exceeds 4.76 BAR (70 psi) a pressure- reducing valve should be fitted. If daytime pressure is less than 1.7 BAR (25 psi) a pressure pump is required.
Identify your plumbing System before installing your Water Softener
Depending on if you have a standard Gravity fed Water System or a High pressure system will determine if you need 15mm or 22 hoses to your water softener. Most Water Softeners come complete with an installation kit which will include all the relevant valves and hoses required for your installation. If you are unsure of your plumbing system please check with your plumber PRIOR to purchase of one of our Water Softeners.
Installation of the bypass for your Water softener
Cut off the rising main and install the inlet tee with check valve. Next, plumb the bypass, inlet and outlet valves so that the water supply can be turned back on. Before turning the water back on, make sure the bypass is open and the inlet and outlet valves are closed. This will allow water to pass directly to the household system without it diverting to the water softener. To bypass the water softener ensure the bypass is open (lever valve will be horizontal) .
Inlet and outlet connections with either the 15 or 22mm hoses depending on your plumbing system then have to be connected to the rear of the Water Softener
The next stage is to install your water softener drain connection. The drain hose may be connected directly into an open drain or via the waste outlet similar to a washing machine. The drain and overflow must be kept straight and not kinked.
In addition to the drain connection the Water Softener will also require an overflow connection. This must be run downhill through an outside wall without any restriction. Most Water Softener manufacturers recommend that the overflow hose is to be run to over an outside gully with a clear 20mm air gap at the end of the hose.
If you have an Electric Water softener you then need to connect the transformer from the water softener to a mains socket.
It is then time to do your final checks on the connectons and the bypass so it is recommended that you close the bypass and open the valves to the Water Softener and check for any leaks.
Now you are almost there! It is time to calibrate your water softener using the Hard water test kit which would normally be provided with the standard equipment. This will determine what the hardness of your water is so that you will get the best performance from your new Water softener. You will then need to set the clock so that the regeneration of the water softener happens when you will not require a soft water supply ( this is normally in the early hours of the morning).
The final thing to to is to fill your Water Softener with salt. Most water softeners recommend Water Softener Salt Tablets. It is recommended a high grade british salt is used to get the best out of your Water softener.
View our full range of Water Softeners.