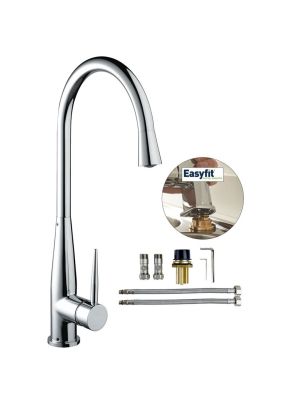
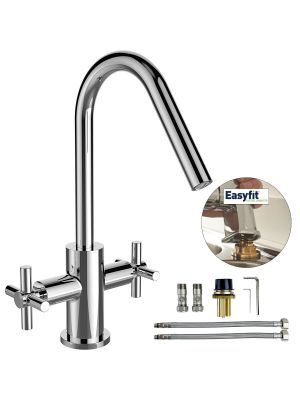
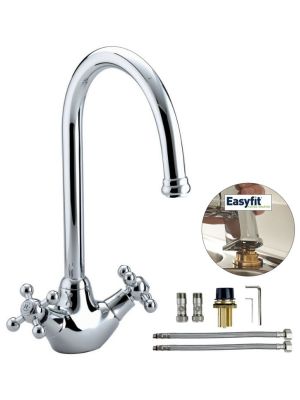
Fitting Bristan kitchen taps has never been easier, with there lastest innovative smart Easyfit technology, the tap base system is pre-installed to save you time.

Simply slot the Easyfit base into the sink, insert the hot inlet connector and fix to the sink. Attach the flexi tails and isolators to the existing water supply. Push the tap body on and tighten both grub screws to finish, As easy as 1,2,3!

What testing has been you carried out on an "EasyFit Tap" 
 
Quality control plays a huge key role in Bristans commitment to market leading product innovation.  
 
Full testing of all Bristan products, designs and concepts are carried out to the highest level. 
 
Bristan has an UKAS accredited on-site facility, in partnership with our parent company, Masco’s state of the art test lab, performs long-life testing and creates high pressure trials to ensure all products meet the highest safety and quality requirements.   
 
EasyFit tap test results are as follows:
 
• External testing by WRAS via the NSF testing house, 5 bar to 20 bar pulse with 30 cycles per minute for 100,000 cycles
 
• In-house variable pressure tested from 16 to 25 bar and back over 24 hours
 
• Fixing strength test by Masco up to 800lb force (3500Nm) without any issues – the sink deformed instead
 
• 280,000 endurance and usage cycle testing showed no movement in the grub screw connection
 
In every instance, without exception, it is our company’s mission to deliver customer’s satisfaction. That is why, every product comes with our no-nonsense guarantee for complete peace of mind. 


7 Items

per page
Set Ascending Direction

7 Items

per page
Set Ascending Direction

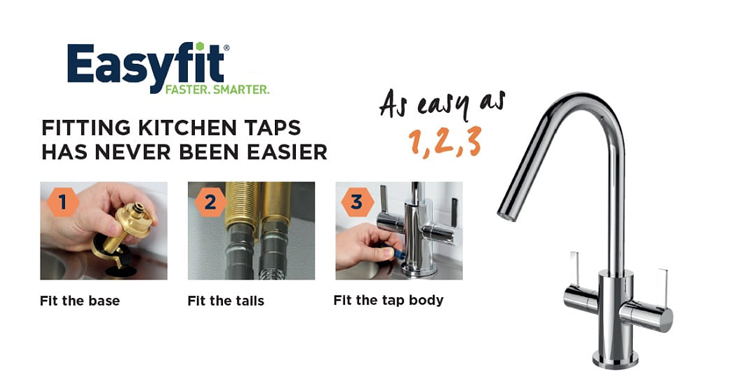
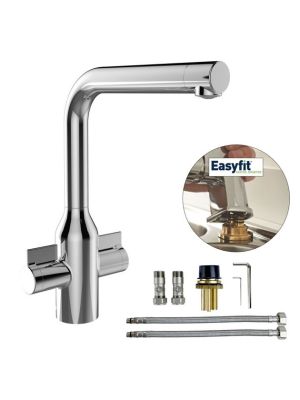
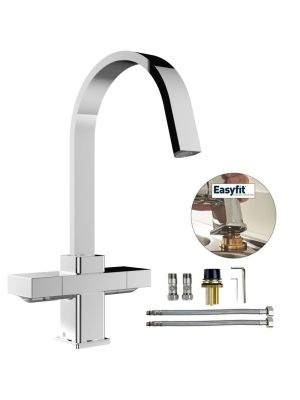
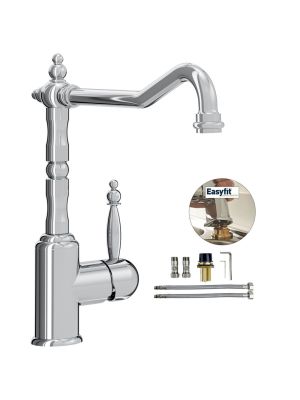
Simple Step by Step Instructions to fit any "BRISTAN EasyFit" Tap :

  1. Fit the base
  2. Remove the plain barrel
  3. from the Easyfit base. Unwind the fitting and insert through the hole in the sink/work surface.
  4. Ensure it’s centralised with the word ‘FRONT’ facing forwards. Using the hex key provided, simply tighten the fitting to the sink/work surface, firmly
  5. Replace the plain barrel
  6. Fit the tails
  7. Connect the flexi tails, to the hot and cold water sources ensuring these are isolated prior using the isolation valves provided
  8. Fit the tap body
  9. Push the tap body onto the base and using the smaller hex key, tighten the two grub screws located either side of the tap body, then open the isolation valves
  10. Bish, Bash, Bosh, Easy As 1, 2 and 3! Done